- Published on
Landscapes in Virtual Reality

- Authors
- Name
- Guillaume C. Marty
- Engineering manager and coach
Available for hire
Lately I experimented with virtual reality (VR) using Google Cardboard, my mobile phone and the amazing A-Frame library.
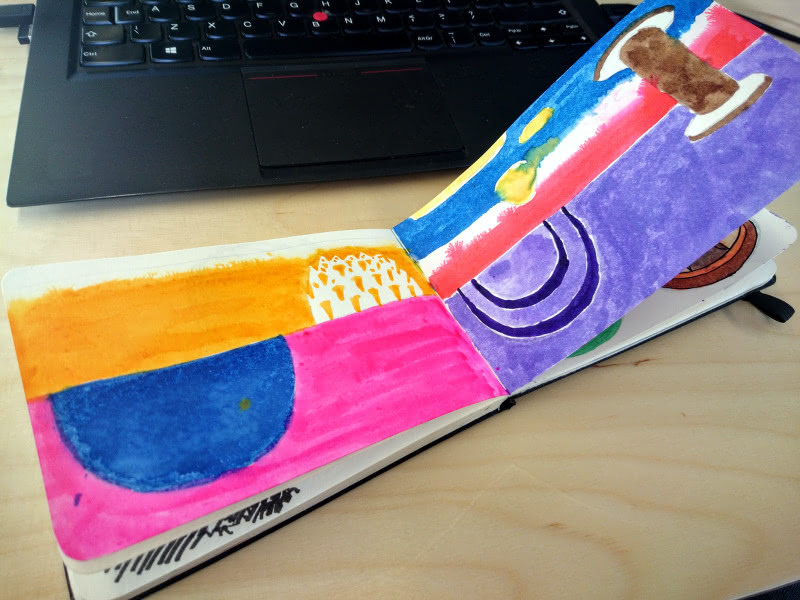
I gave it a try at drawing myself VR landscapes. It turns out VR textures are a form of anamorphosis. Some artists like Dali drew such projections. To reconstitute a normal image, you need a special device, in our case a VR environment.
What I learnt
VR is an immersive technology. To feel yourself part of a VR landscape, we apply a texture to the sky (see the <a-sky> element in A-Frame). A texture is a simple image that is distorted to the inside of a sphere.
Drawing a landscape for such a projection is really counter-intuitive, but here are some of my findings.
Equirectangular projection
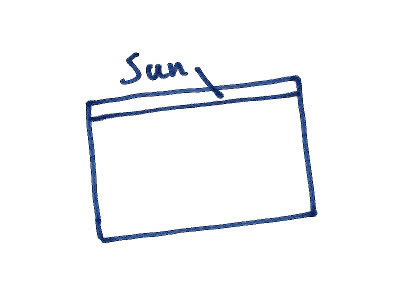
The easiest way to get started with drawing your own landscapes for VR is to start with a image (or paper, canvas…) twice as large than high (once scanned, 4096 × 2048 works pretty well).
In an equirectangular projection, the top line of the image is distorted in such a way that it’s merged in a single point. The same apply to the bottom. This means that the closer to the top or bottom an object is the smaller it will be rendered in the VR scene. its width will be squeezed.
The left and right sides of the image are merged together. To make it feel seamless, be sure to draw something that looks the same on both lateral sides or stitch lines may appear.
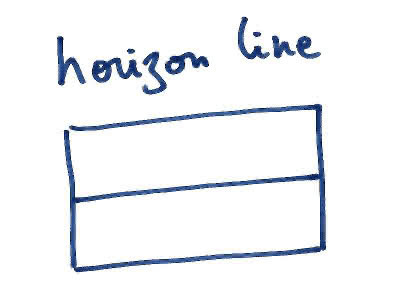
The horizon line
If you draw a horizontal line right in the middle of the image, this is going to be rendered as your horizon line when you place the camera in the centre of the sphere.
You can play with it. Make it slightly higher and the user will feel that they’re trapped in the group (or maybe surrounded by mountains), making the final result a bit suffocating.
If you lower the horizon line, the user will think they’re flying.
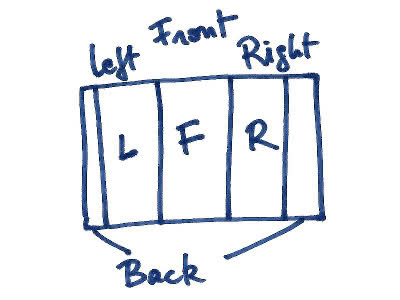
4 sides
Your field of view fits in roughly 1/4 of the image width. If you draw a single element larger than 1/4 of the width, it will force the user to look left and right to see it entirely, without being able to see it completely at once.
Be creative with it. Big elements like monuments or mountains should be larger than 1/4 of the width. Smaller elements like vehicles or trees should be much smaller.
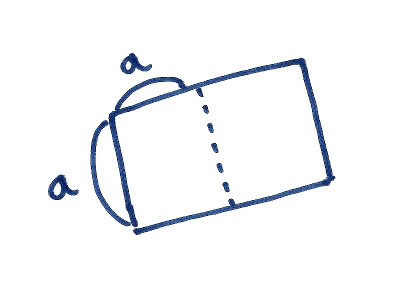
Sphere in the sky
As explained above, the equirectangular projection will merge the top of the image to a single point. If you want to draw a circular object right above the user, draw a stripe going from the top of the image on a small fraction of the height. This will render as a perfect circle if the line is parallel to the top of the image.
Of course this principle applies to the bottom of the image too.
The result
I uploaded my experiments. On your mobile, go to: gmarty.github.io/vr-landscapes/ Grab a Google Cardboard and insert your phone. You can change the landscape with the click button.
Drawing for an equirectangular projection leads to results that are hard to predict. Another technique is to draw on the 6 sides of a cube and use a software to turn this cubic texture into an equirectangular projection, but I haven’t tried myself.
If you want to give it a go, you can reuse the code on Github. Just replace the images by yours. Then, share your creations and ideas in the comments section below.